Factory Layout for Image Reference
This instruction informs you how to add your layout factory image into 3D portal that can be used as reference images to place your machines precisely according to the layout. The layout cannot be directly uploaded into 3D portal as an image (jpg/png), it should be converted to Babylon file through the blender application.
Resources
Download Blender 3D: https://www.blender.org/download/
Download the Blender to Babylon exporter: https://doc.babylonjs.com/resources/blender
1. Scene Setup
3D Visualizr has a scale of 1 unit = 1 meter.
In Change scene units into metric and keep unit scale as 1
On default the Babylon exporter applies PBR materials to the export, which has to be ticked off in the World settings as PBR Materials aren't currently supported in 3D Visualizr
"World Properties" Menu --> Ticked off "Use PBR Materials" option

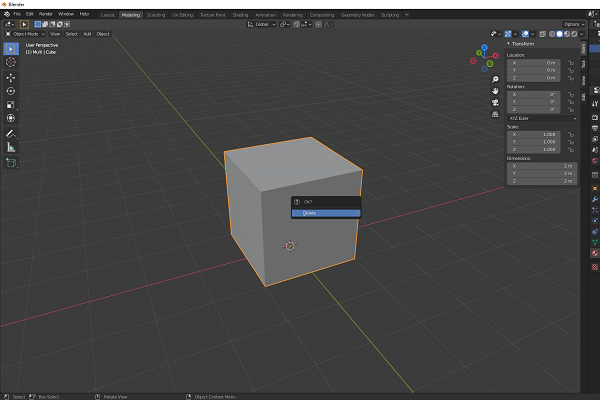
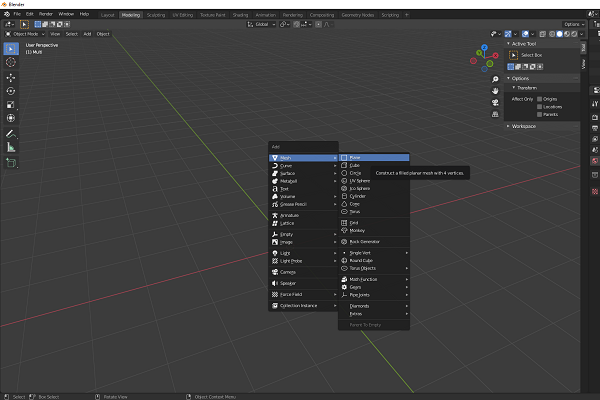
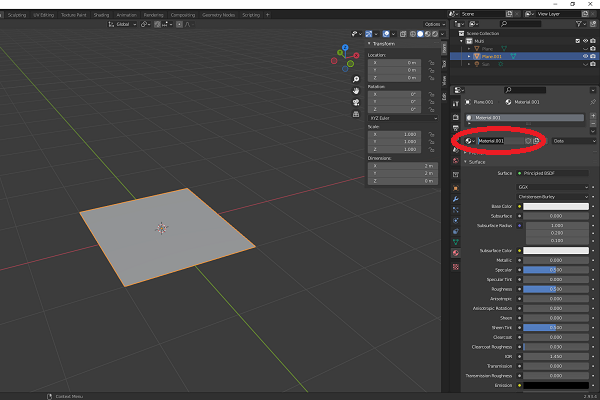
2. Add Object
First, delete default cube that usually there when we are opening blender, press “X” then choose “Delete”
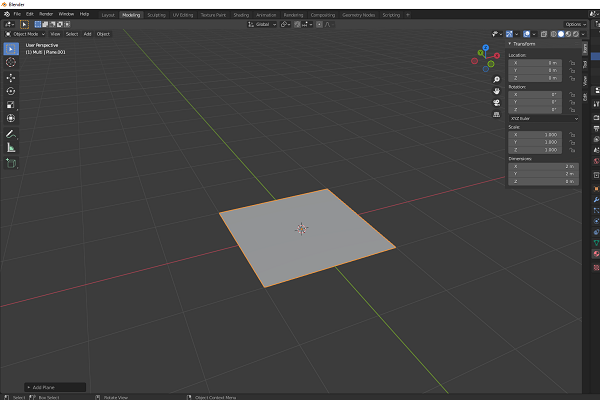
Add object by click Shift+A and choose “Mesh” then “Plane”
and it will look like image below
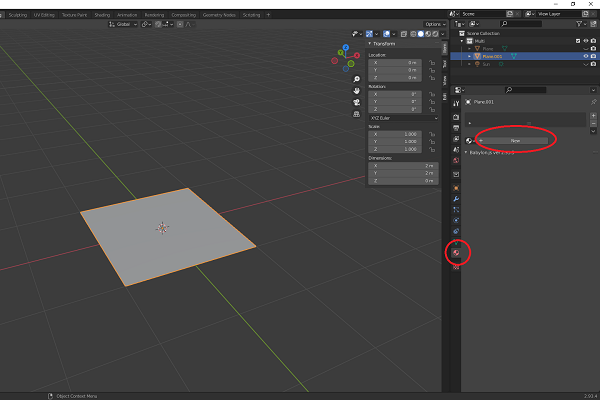
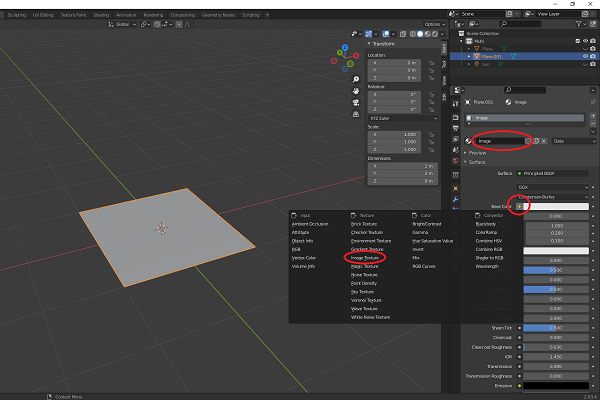
3. Add Texture Image
Click Material Properties, and click “New” for adding new texture
Renamed as you like, while I renamed the texture as “image”
As it shown, the texture name changed into “image”. Click “tiny yellow button” next to Base Color, and choose “Image Texture”
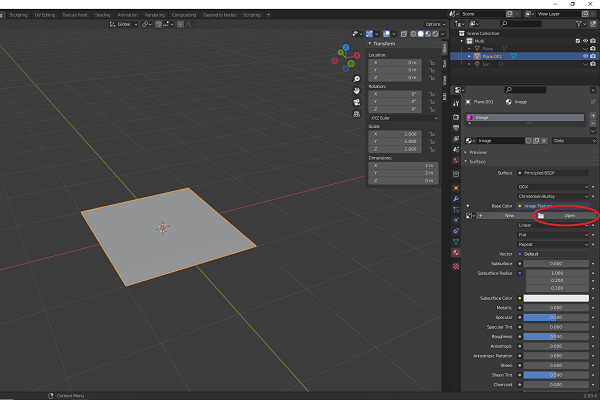
Click “Open”
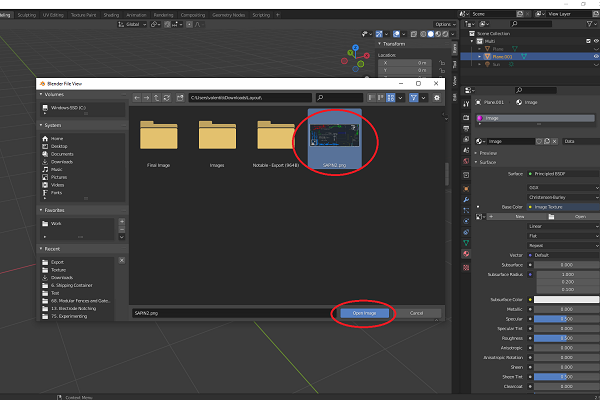
Chose the layout image that you want to have
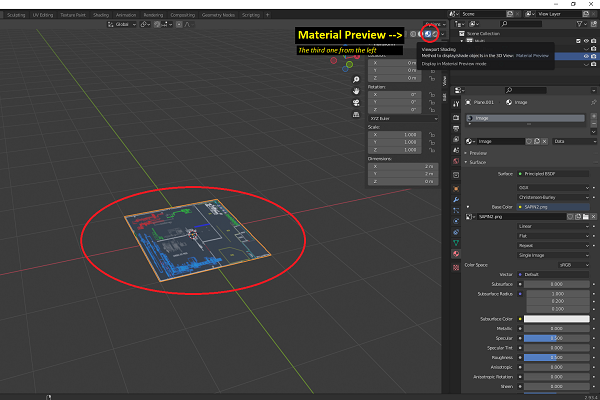
Change the “Viewport Shading” at the top of right screen into “Material Preview” (the third ones from the left) to able to see the image on the mesh The texture will appear at the plane mesh object
4. Adjusting The Texture
On this instructions we have a rectangle factory layout image while the object mesh is square, so we need to adjust. If your factory layout same as the object mesh, you can skip this step and move to Step 6.
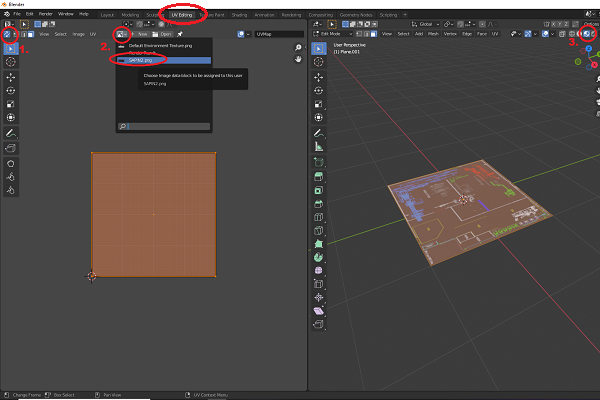
Move to “UV Editing” Screen (previously we are in “Modeling” screen)
- Turn on “UV Sync Selection on the top left
- Open image and choose your layout image
- make sure you are still in "Material Preview"
The view should be like this
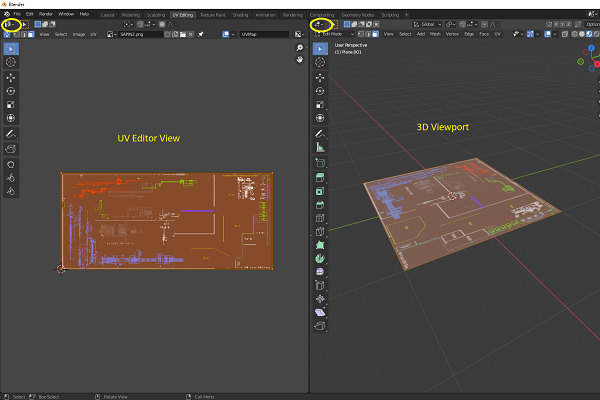
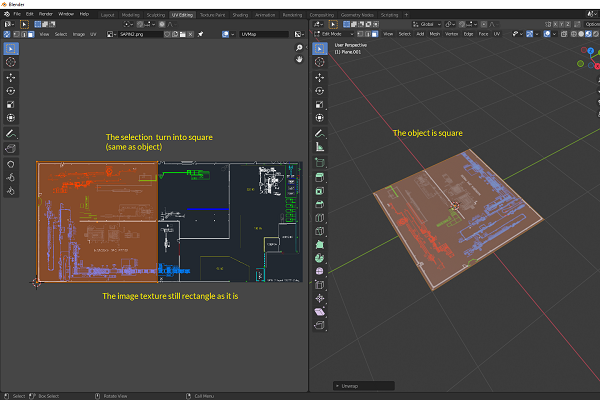
We need to adjust the texture since the shape of plane is “square”, while the selection on the texture image is “rectangle” If you are not adjusting the texture, it will stretched
Change to “Edit Mode”, and at the object press “U” then “unwarp”
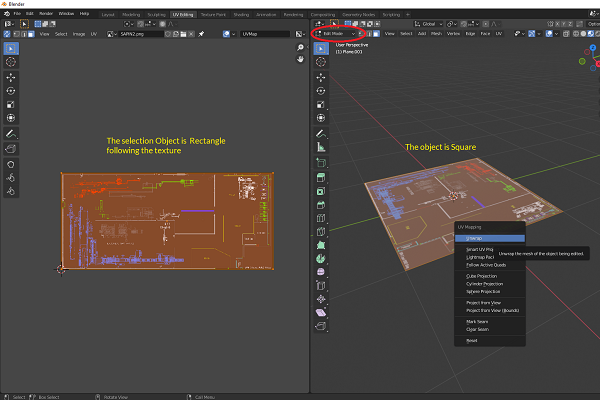
Now the selection shape is square same as the object
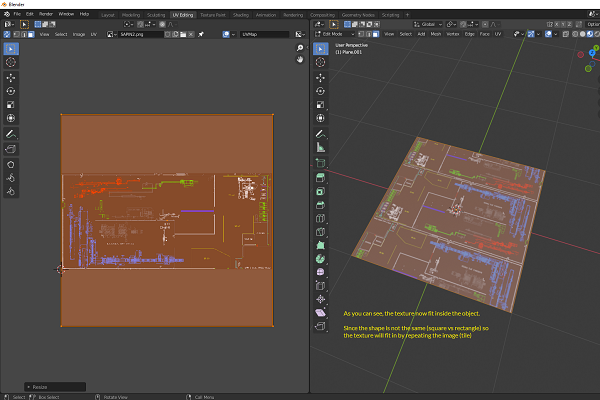
Mouse in the selection object (UV Editor View). Select all (press “A”) and Scale the selection object (press “S”) until is covered all the texture move the mouse accordingly
5. Adjusting the shape object
On this instructions we have a rectangle factory layout image while the object mesh is square, so we need to adjust. If your factory layout same as the object mesh, you can skip this step and move to Step 6.
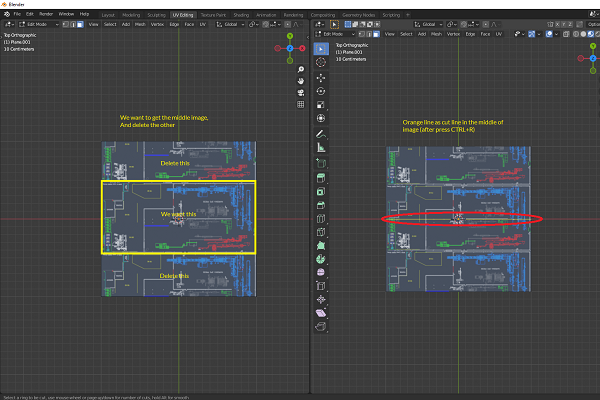
Slice the object, press CTRL+R, move the mouse to object, and and Orange line (as cut line) will show Click the mouse without move the line, the line will be in the middle of object. Make sure the line is aligned with the image texture
Press CTRL+B to bevel, move the mouse to adjust the cutting line (the orange lines) you can change to "Edge Selection" to move the cutting line, then press "G" twice
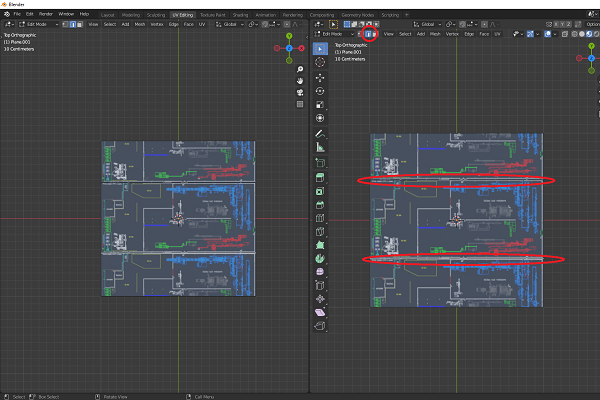
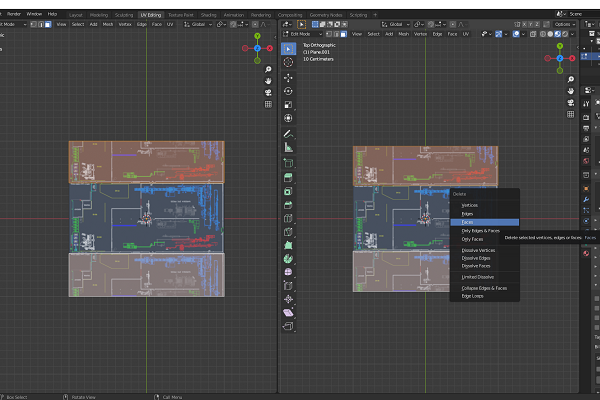
Change to “Face Selection”, select the side face objects and leave the middle ones
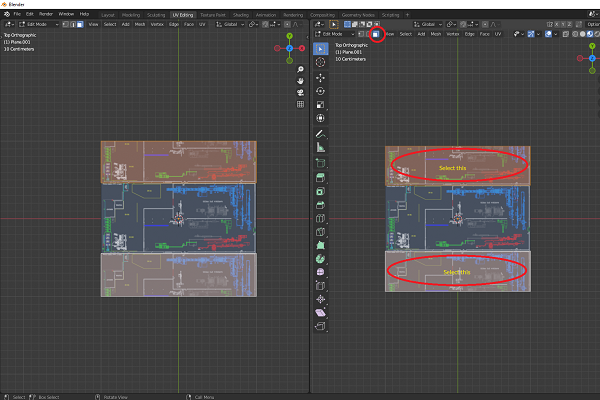
Delete. Press “X” and choose “Faces”
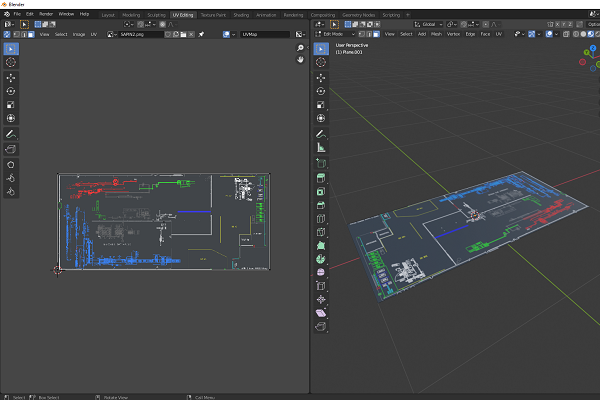
Now the object shape and the texture image is same (rectangle)
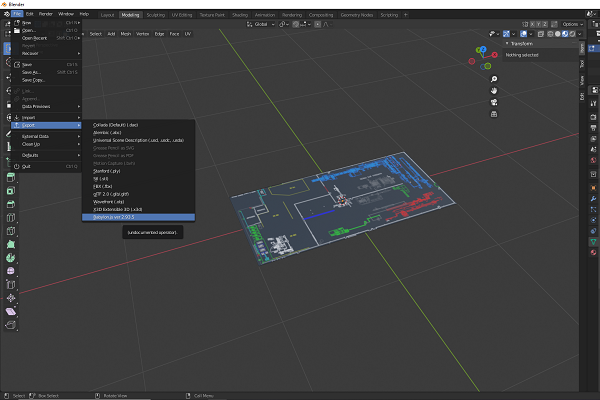
6. Export to Babylon File and Upload to 3DV
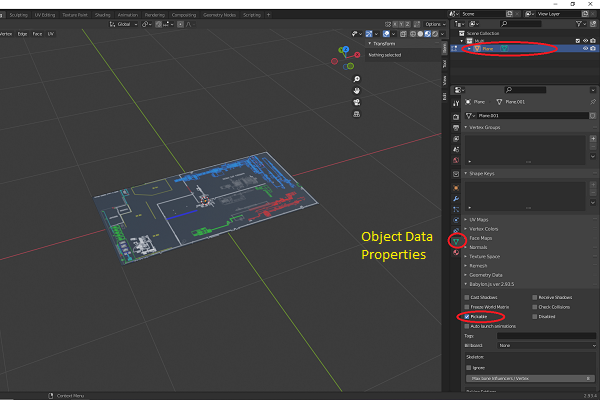
Click “Object Data Properties”, and thick on “Pickable”. And make sure it is only one object (there is nothing else) to be exported
Then exported to Babylon file. Click "File" – "Export" – "Babylon Js"
Make a zip file for these files:
- Babylon file
- Manifest file
- Texture file (jpg/png)
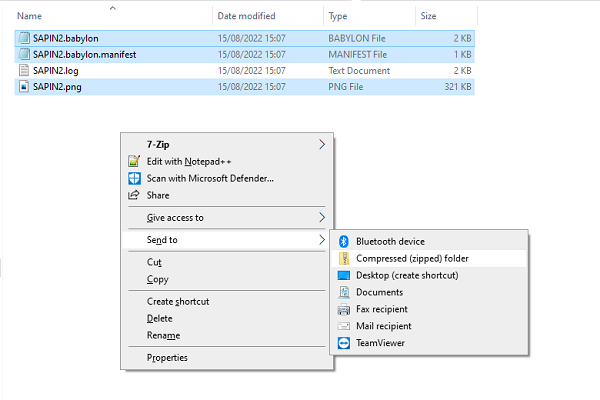
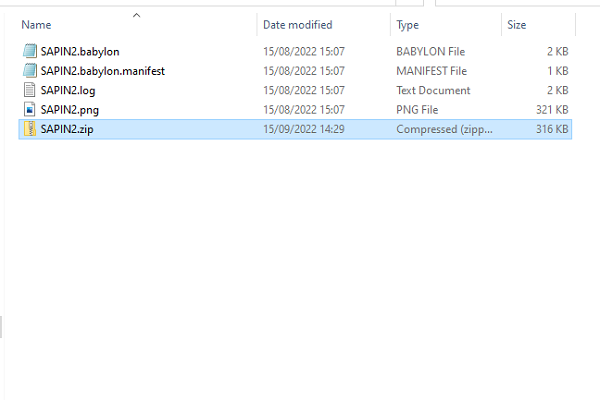
And upload Zip file to 3DV portal.