CAD Converter Guide
This is Elisa IndustrIQ's Blender standalone version. This is an interactive tool that helps you to convert any CAD formats to the BabylonJS format. Currently Windows is only supported.
Free Download
Source Code
Supported file formats
| Format | Description |
|---|---|
| STL (*.stl) | STL files |
| OBJ (*.obj) | OBJ files |
| FBX (*.fbx) | FBX files |
Running the Converter
The tool can be opened from the dowloaded and extracted "Release" folder, by running "blender.exe" application.
If Windows warns about running unrecognized programs, you might need to click "More info" to be able to run the program.
How to use
- Export a single station/machine/asset
- Import that asset into CAD Converter
- Follow the instructions inside the converter
- Export as Babylon file
- Import to 3DV
Best practices
The converter is intended for users that want to quickly and easily see their CAD models in our 3DVisualizr, and the easiest files to work with tend to be the simplest ones, like small individual machine parts. The converter process is not perfect, and sometimes a CAD file might not have the best end result with default settings. The converter has settings on how to process the models, and some experimentation might be needed to find the best result. On the flip side, higher quality will mean longer time for the converter process the models.
3DVisualizr is a web based 3D viewer, and unprocessed CAD files will cause slowdown of the viewer, and the files usually take a lot of disk space.
Navigating the Converter
The converter tool is a highly customized version of Blender 3D, any familiarity with it will help with navigating the converter. You can in most cases move freely between the steps, but sometimes the next step button is hidden becausethe step has an action that’s required to be taken as later steps depend on it. (for example decimation in the optimization step) As soon as the action is done, the next step button appears
Controls
- Middle mouse button (MMB) will rotate the view around a virtual pivot point.
- Shift + MMB will pan the view.
- Scrolling will zoom in and out towards the virtual pivot point.
- Mouse left click while hovering over an object will select it.
- Shift + mouse left click will add/remove object to/from selected objects.
Getting Help
There is a dropdown menu on the top-right corner of the screen where you can find the link to our documentation, an email prompt to contact us, and a reset file button for if you need to reset the file. The reset button file will ask for confirmation.

Walking through the steps
Import Model
Currently supported models are .obj, .fbx and .stl. By pressing the IMPORT MODEL button, a file view window will open where you can navigate to your file. The file will have varying import times based on complexity, file size and the computer's processing power. The importer will do some cleaning up and preparation for use in the converter.
Size
Here you can change the scale of the objects very easily. Usually when importing files the objects’ scale is off by a factor of ten, but the converter does some automatic scaling on import. You can also remove objects that are less that the specified length. This works by comparing the longest side of the object to see if it can be removed. You can use this function multiple times while adjusting the minimum object size parameter to create the simplest file while preserving the same general look.
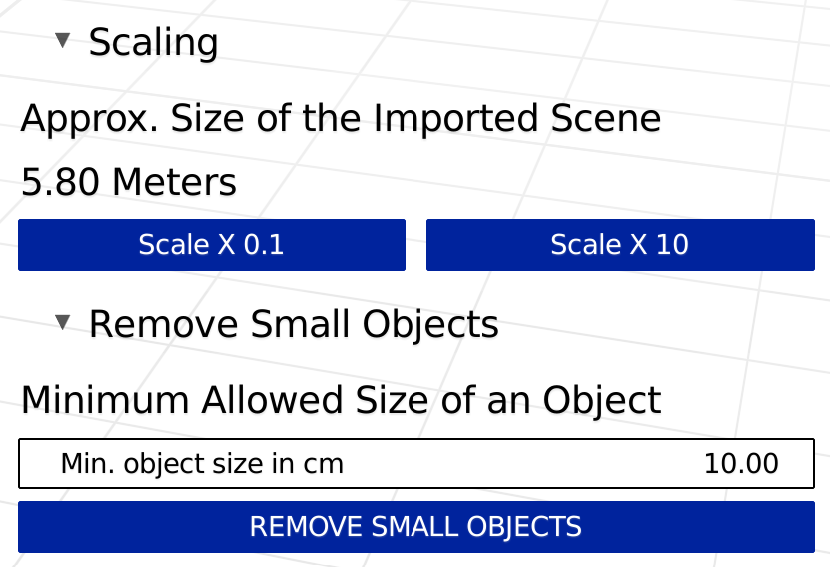
For example, the minimum length is set to 4cm and there are two 2cm wide bolts on a machine, but one of them is 5cm long while other is only 3cm long. The 5cm long bolt will remain in the scene as one of its lengths is longer than the minimum allowed, but the 3cm long will be removed as its size does not exceed the minimum allowed length in any axis.
You can scale the models easily with the Scale X 0.1 and Scale X 10 buttons, which scale the models by 90% and 1000%. The value in Min. object size in cm can be changed by click and dragging left or right or clicking on it, and then typing the value. REMOVE SMALL OBJECTS will delete the objects met by the criteria.
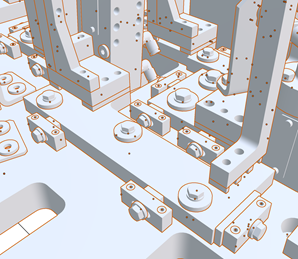
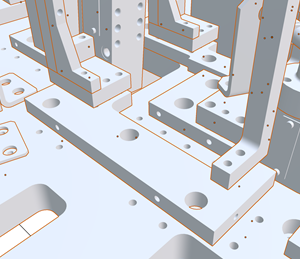
Removing small objects like screws and washers.
Materials
An object in the file contains meshes, and objects usually have materials assigned to the meshes. To have materials in the 3DVisualizr, objects need to have the right type of materials that work with the engine, and they need to be assigned manually. You can assign a material to an object, and if an object doesn’t have a material assigned to it, a white material will be automatically assigned to it. There are several ready-made materials for you to choose from. The objects will usually have materials assigned to them in the CAD software they were made with.
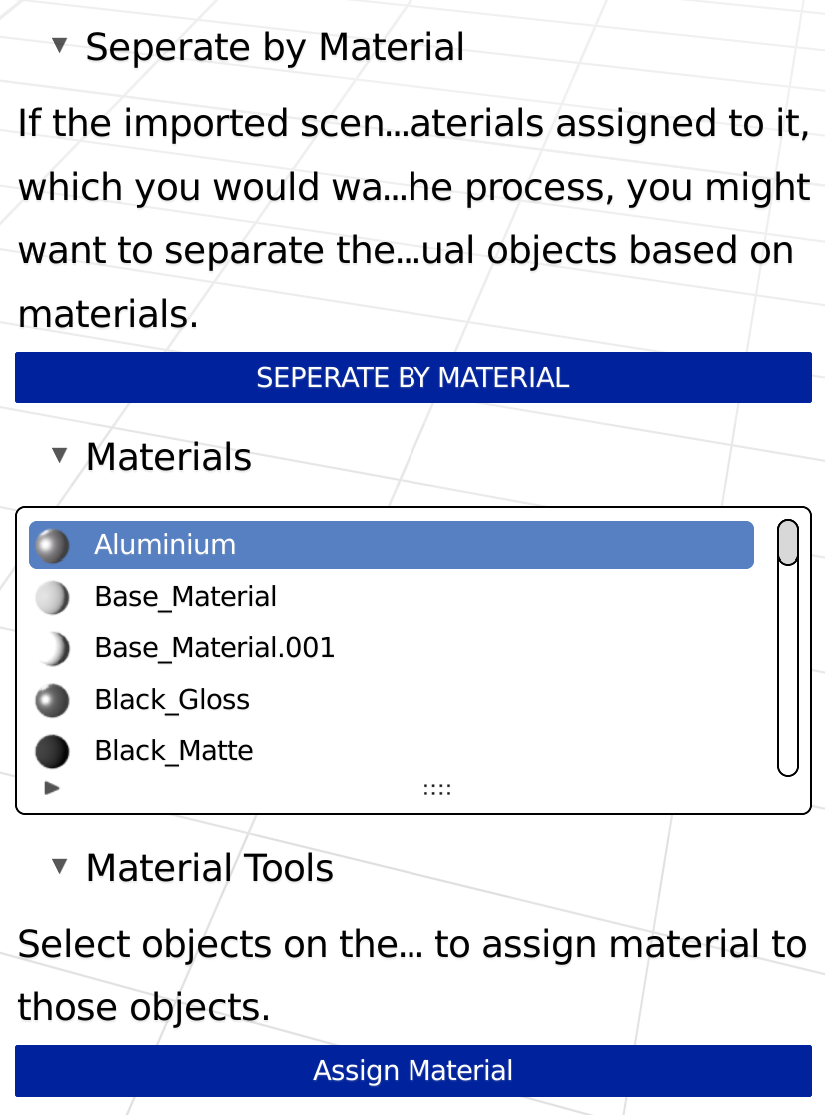
If the imported scene already has materials assigned to it, which you would want to preserve through the process, you might want to separate the scene to individual objects based on material assinged to the mesh. You can do this by pressing the SEPERATE BY MATERIAL button.
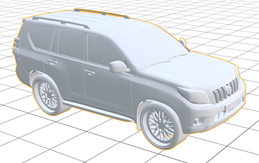
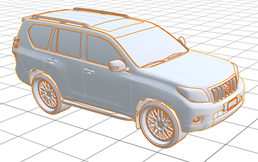
To assing a material to an object, you need to select the object by hovering over the object you want to select and clicking left mouse button, and the selected object will have an orange outline. You can add/remove extra objects to your selection by holding Shift and selecting an object.
After you have your objects selected that you want to have the same material, you can find a material you want in the list of materials, which you can navigate with scrolling. Select the material you want by clicking on it, and then you can press the Assign Material button and the selected objects' materials will be updated and visible.
Point of interest
Points of Interest are the important parts of the asset that you can attach data points to in the 3DVisualizr. By default the data point will be in the center of the exported object, but by assigning objects as points of interest you can attach data point to them as well.
Optimization
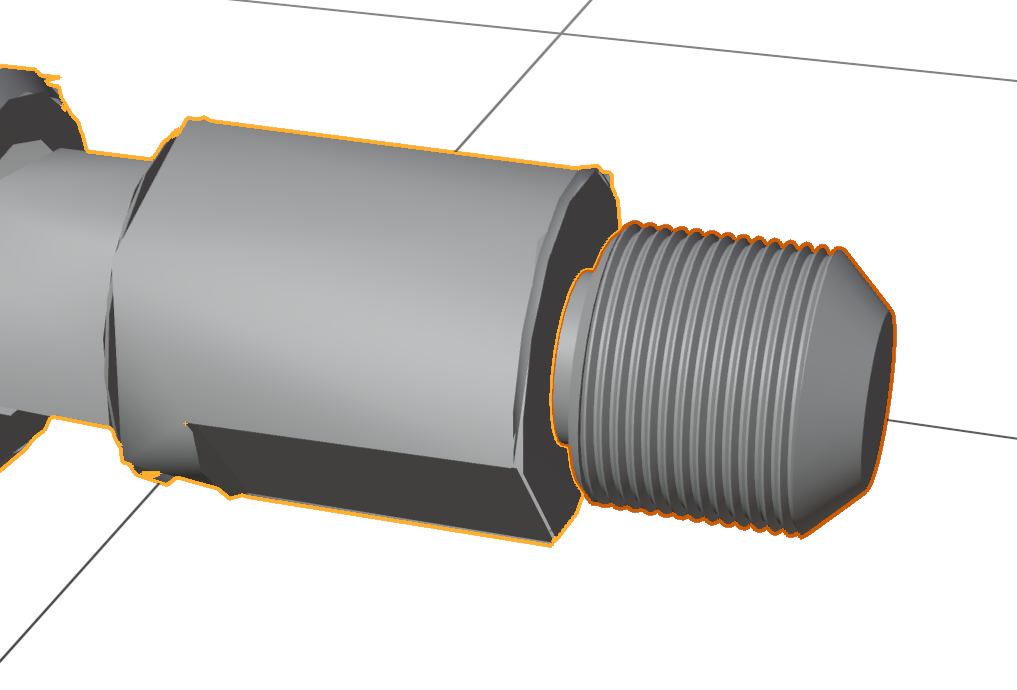
Most CAD files are too large for our 3D Visualizer out of the box, so a step to reduce the number of faces (polygons) is needed. ~750 000 for whole scenes and ~50 000 for individual objects are reasonable amounts of faces, but the lower the faster everything will be. You can choose objects that are excluded from the decimation, as the decimation will reduce the quality of the mesh.

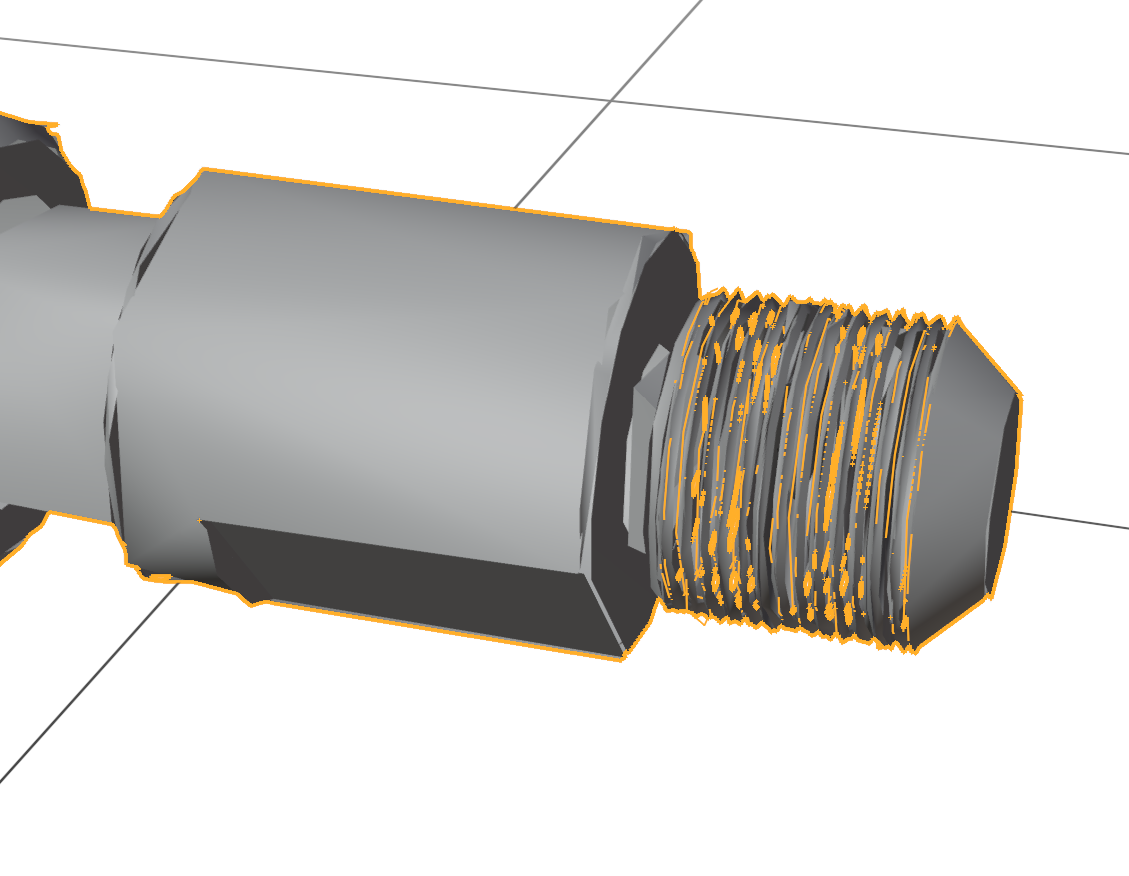
Sometimes the object doesn't decimate well, so some visual errors might occur. To get around this issue it is possible for an object not to get decimated by adding them to the "Protected Areas" group.
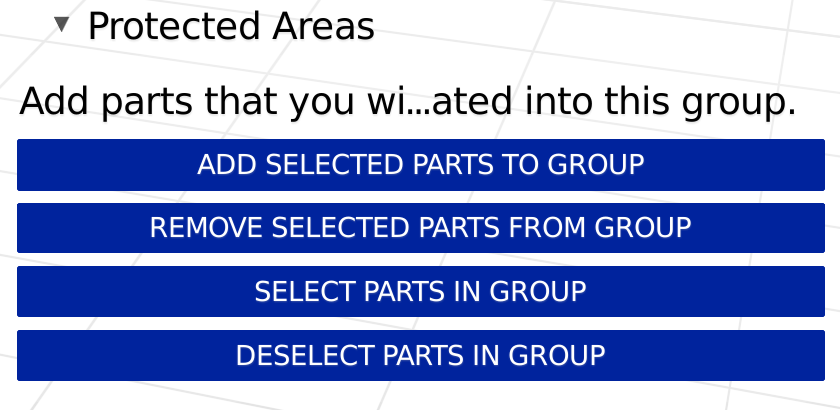
The object that has threads didn't decimate properly because of it's difficult geometry, and affects the quality of the whole object. After undoing the decimation and then adding the thread object to the protected group will help with the quality at the cost of more complex mesh.
Texture generation
Bake the appearance of the model into a texture file to keep the model optimized for web viewing. Texture baking can take a long while. Keep the bake quality and texture size as low as possible without losing visual quality. If the resulted texture is blurry, consider raising Texture Size. If the resulted texture is noisy, consider raising Bake Quality.

Examples of different bake settings, first image is before the baking process and then LOW, MEDIUM and HIGH.
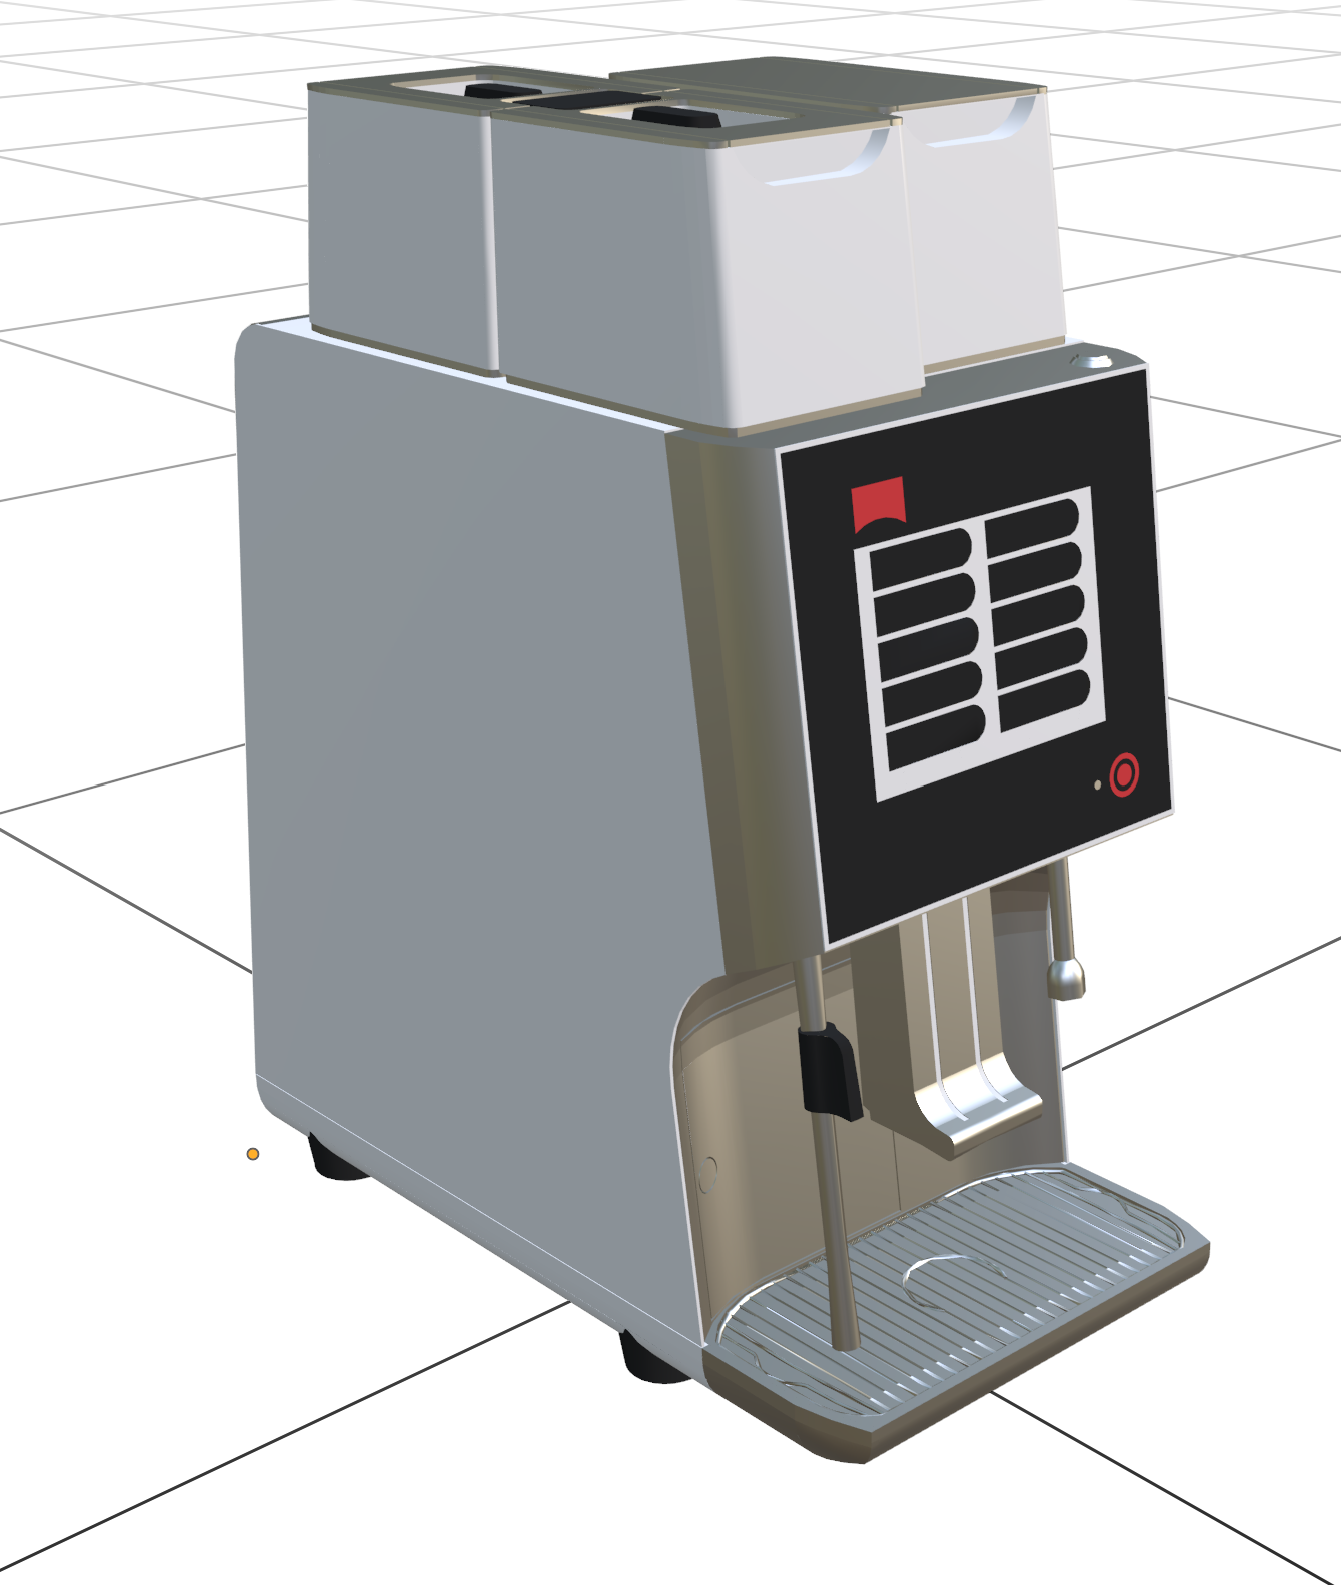
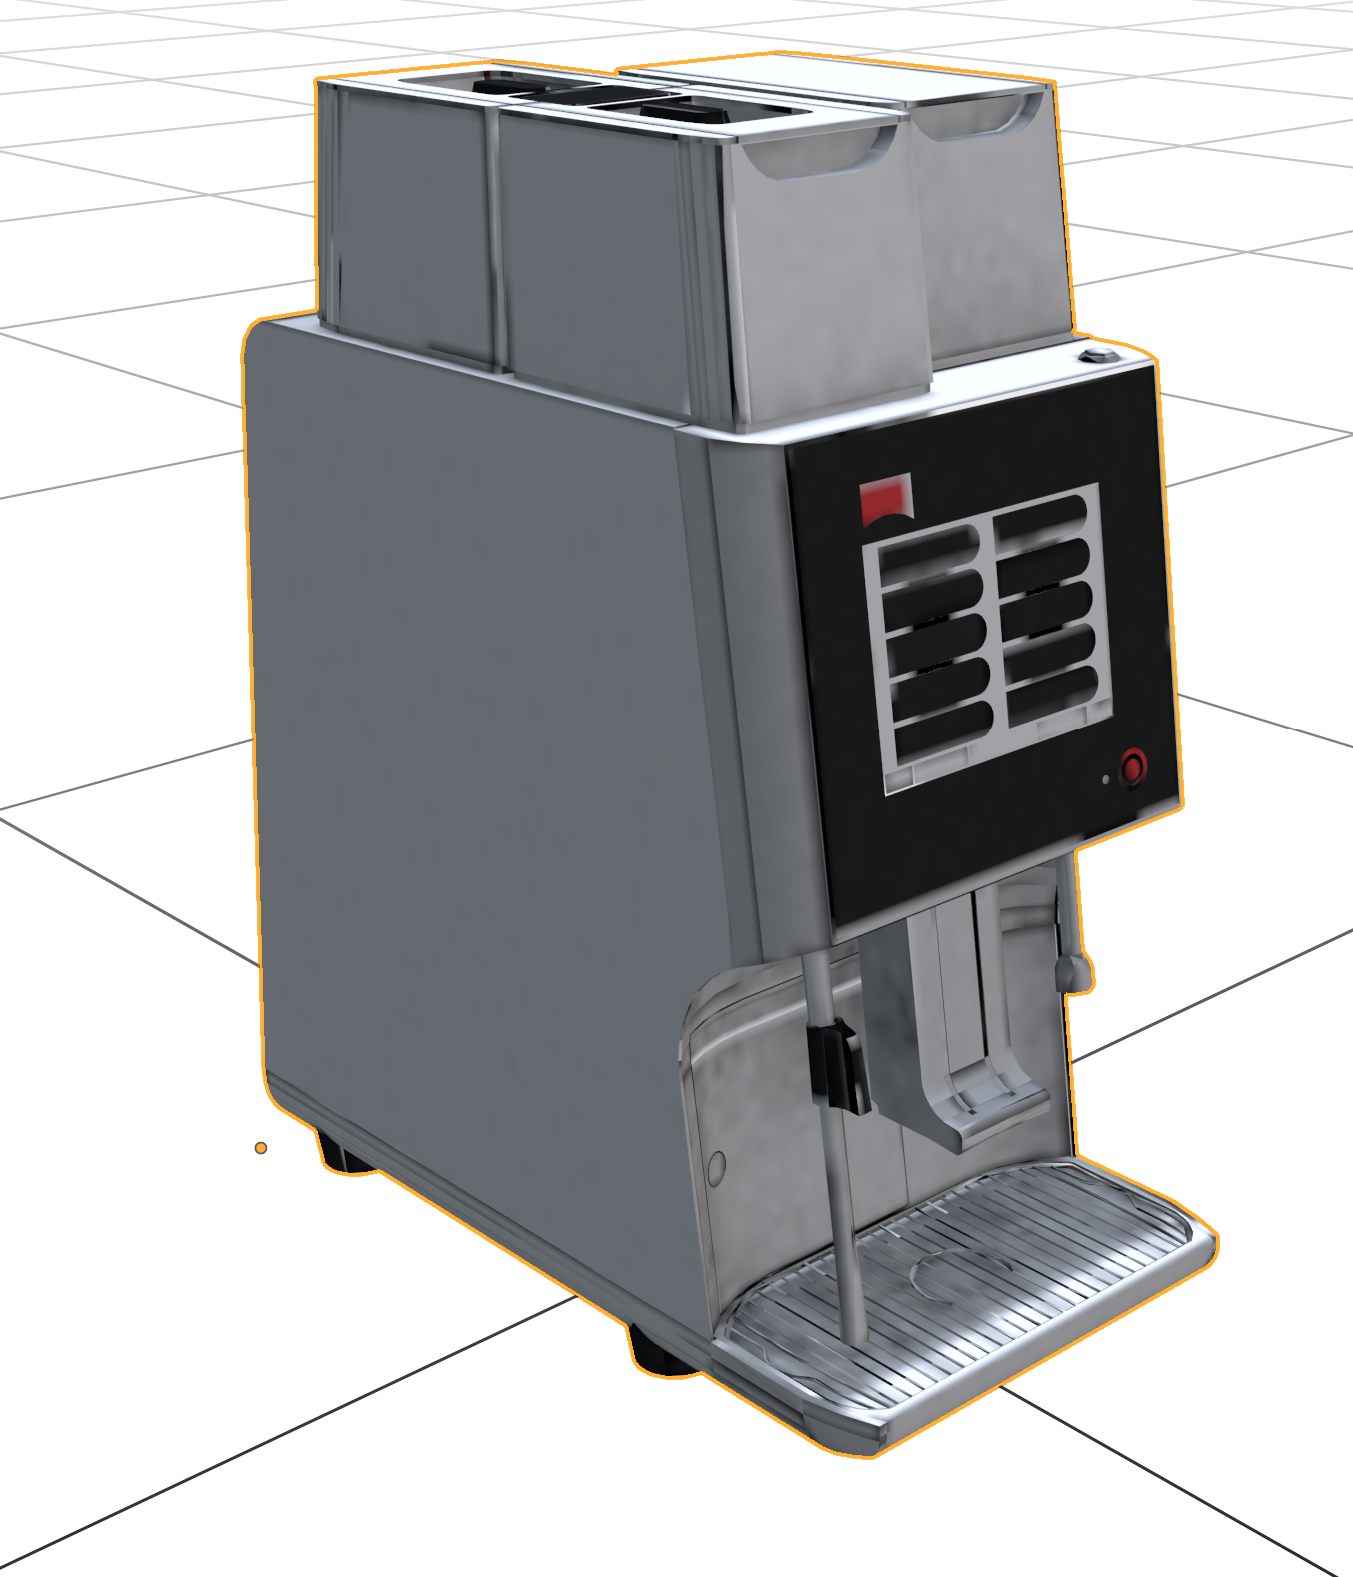
A coffee machine before baking, and with LOW settings.
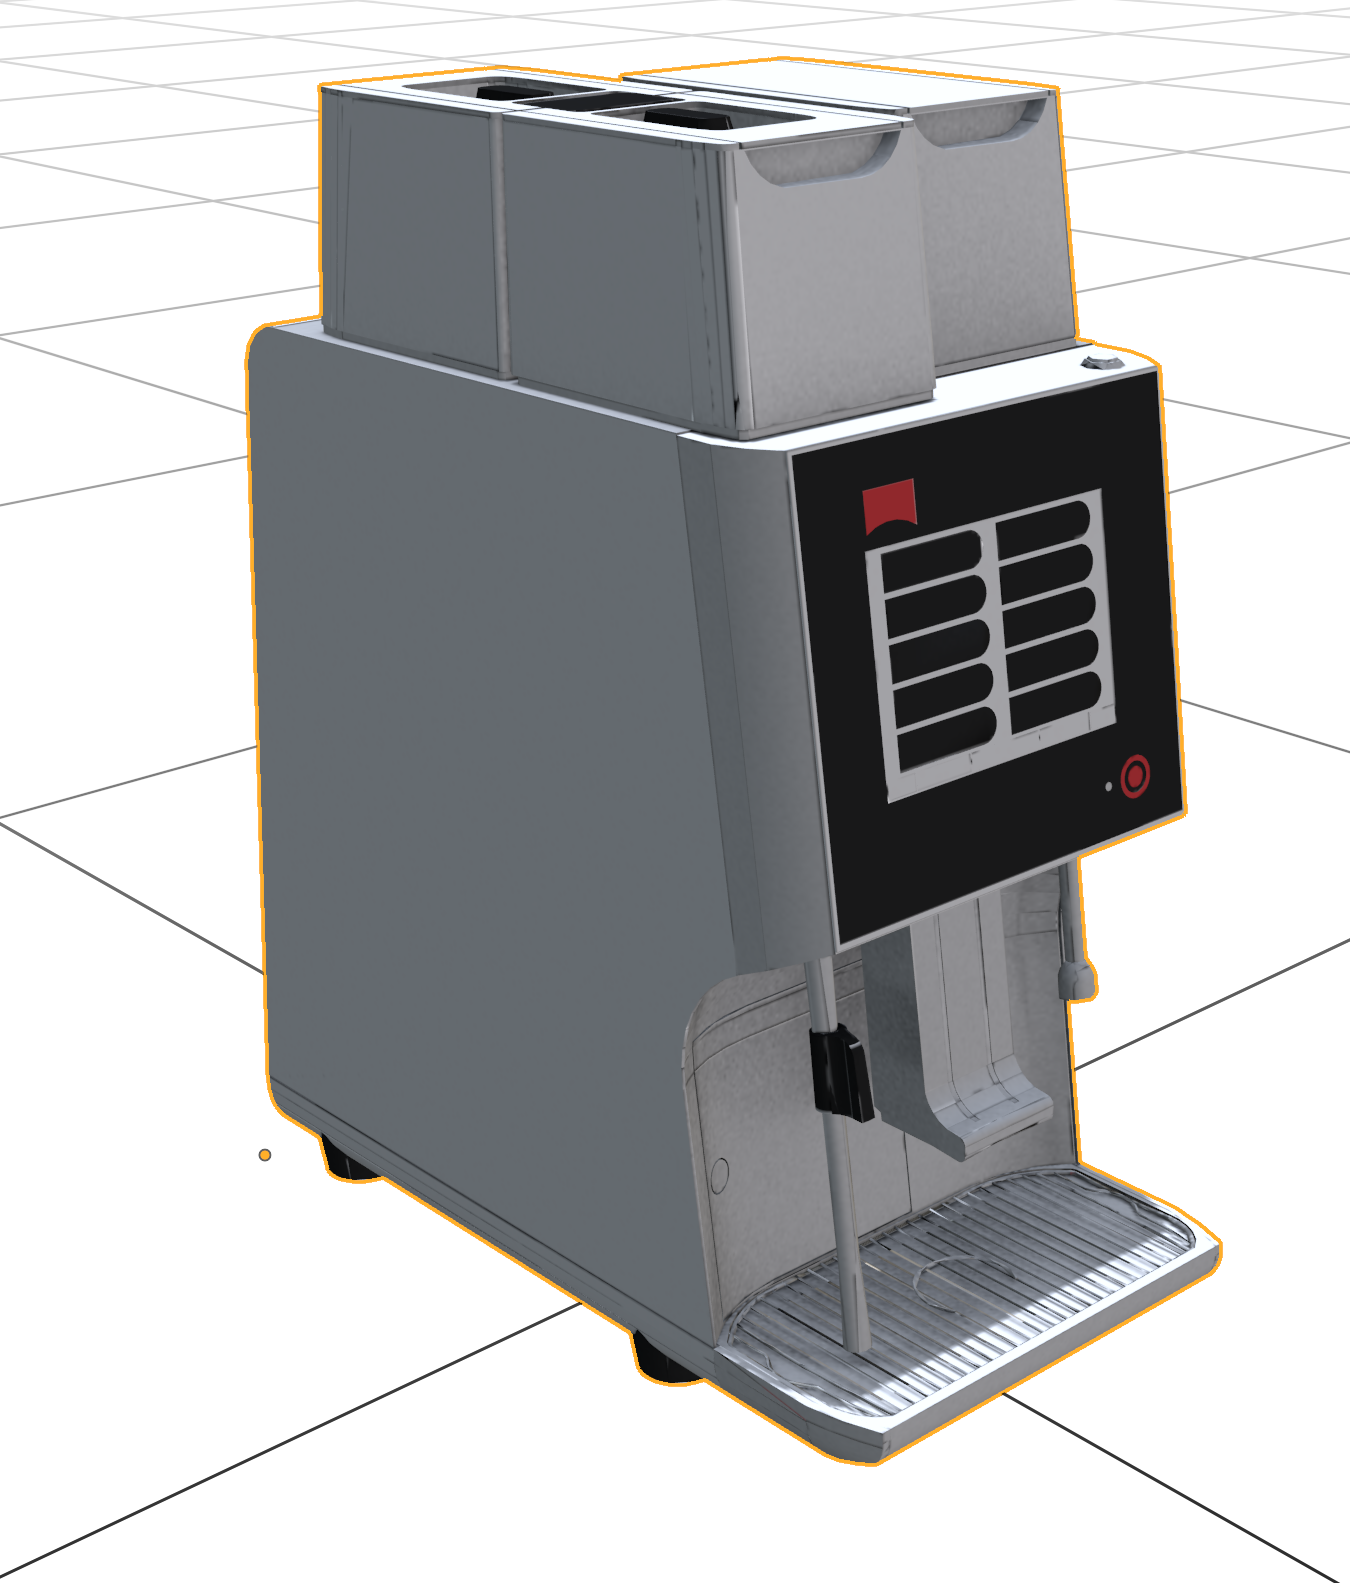
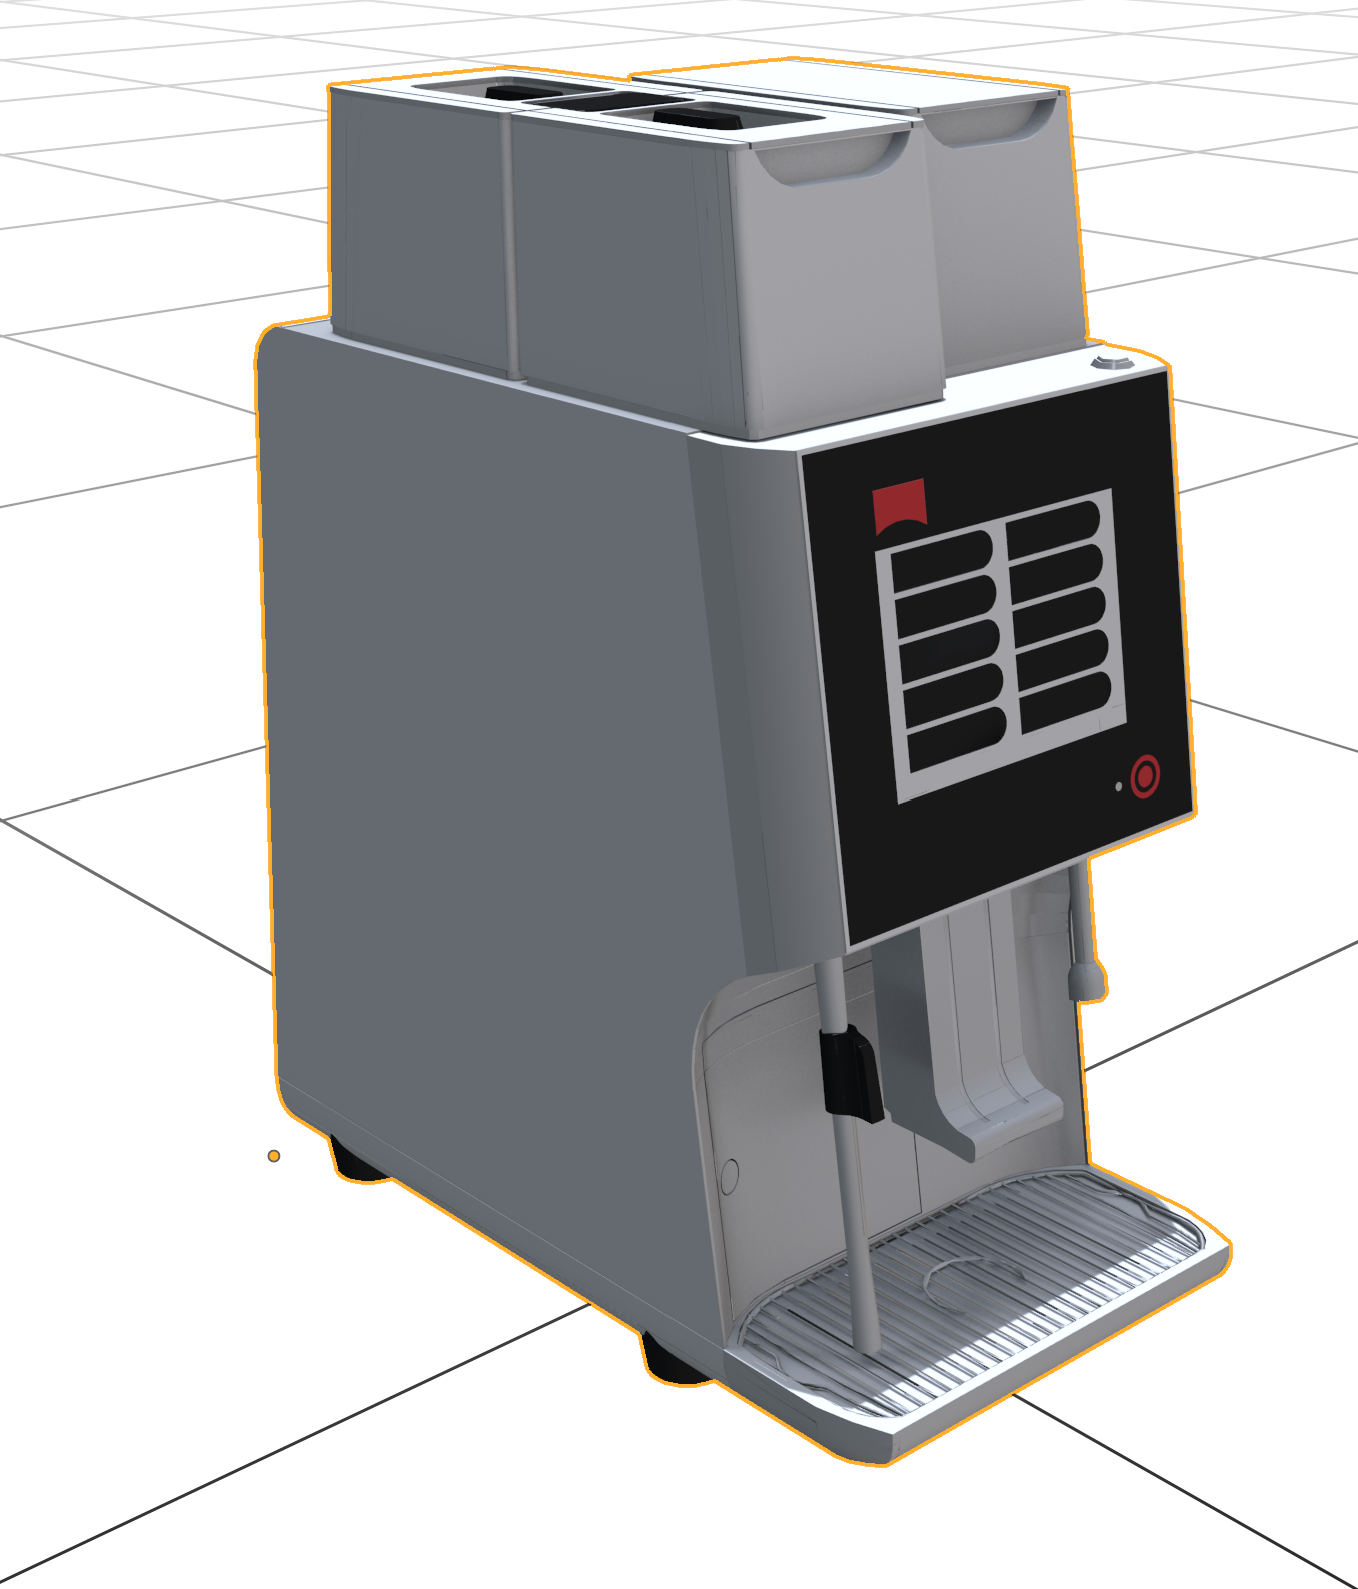
MEDIUM and HIGH settings.
Exporting
Export the models to the Babylon format, which is what our 3D Visualizer uses. You can choose the filename and choose the file location. The exporter will output the raw files as well the .zip file that is ready for upload in our 3D portal.
You can find out about how to upload the files to our 3D portal here
Troubleshooting
Licenses
Elisa IndustrIQ's CAD Converter is released under the GNU General Public License (GPL, or “free software”).
This license grants people a number of freedoms:
- You are free to use the addon, for any purpose
- You are free to distribute addon
- You can study how addon works and change it
- You can distribute changed versions of addon
The GPL strictly aims at protecting these freedoms, requiring everyone to share their modifications when they also share the software in public. That aspect is commonly referred to as Copyleft.